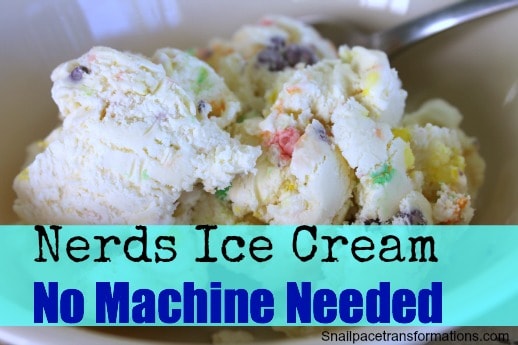
Easy No-Churn Nerds Ice Cream: Homemade Fun for Kids
Imagine the sheer delight on your child's face as they create their very own vibrant, sweet, and tart dessert. Making homemade ice cream can often sound like a daunting task, requiring special equipment and a lot of time. But what if we told you there's a way to whip up incredible
nerds ice cream without any fancy machines, a method so simple even the littlest hands can help? Get ready to unleash a burst of flavor and a rainbow of color with this incredibly easy no-churn
Nerds ice cream recipe – perfect for a fun family activity and an unforgettable treat!
Nerds candy, with its unique crunchy texture and intense sweet-and-sour punch, is a nostalgic favorite that truly shines when folded into creamy, frozen goodness. This recipe transforms simple pantry staples into a show-stopping dessert that’s bursting with personality, making it an instant hit for birthdays, playdates, or just a sweet afternoon surprise. Say goodbye to complex steps and hello to pure, unadulterated ice cream joy.
Why No-Churn is Your Best Friend for Family Fun
The beauty of no-churn ice cream lies in its incredible simplicity and accessibility. Traditional ice cream typically relies on an ice cream maker to constantly agitate the mixture as it freezes, preventing large ice crystals from forming and resulting in a smooth texture. However, the no-churn method bypasses this entirely, using heavy whipping cream that's beaten to stiff peaks to incorporate air. This trapped air, combined with the high fat content of the cream and the sugar in sweetened condensed milk, prevents the mixture from freezing solid and creates a wonderfully light, smooth, and scoopable consistency, very similar to soft-serve.
For families, this means:
*
No Special Equipment: All you need is a mixer (handheld or stand mixer) for the cream, a bowl, and a freezer-safe container. No need to invest in a bulky ice cream maker.
*
Kid-Friendly Participation: Without sharp blades or complex machinery, children can safely participate in almost every step, from measuring ingredients to folding in the candy. It’s a fantastic opportunity for them to develop kitchen skills and feel a sense of accomplishment.
*
Quick Prep Time: The active preparation time is surprisingly short, often less than 20 minutes, making it ideal for busy schedules. The longest part is simply waiting for it to freeze!
*
Easy Cleanup: Fewer dishes mean less time scrubbing and more time enjoying your delicious creation.
Embracing the no-churn technique isn't just about ease; it's about making dessert creation an engaging, stress-free experience for everyone involved, especially when introducing vibrant mix-ins like Nerds candy.
The Magic Formula: Basic No-Churn Nerds Ice Cream Ingredients
At the heart of any great no-churn ice cream are two fundamental ingredients that work in perfect harmony to create that desirable creamy texture and sweetness. This basic foundation allows for endless customization, but for our star
nerds ice cream, we'll keep it delightfully simple.
Here’s what you’ll need:
*
Heavy Whipping Cream (or Heavy Cream): This is the workhorse of your no-churn recipe. When whipped, it incorporates air and creates the light, ethereal base for your ice cream. Always ensure it's very cold for the best results – chill your bowl and beaters too if possible!
*
Sweetened Condensed Milk: This thick, sweet dairy product serves multiple purposes. It provides the necessary sweetness, prevents the ice cream from freezing into a rock-solid block (thanks to its high sugar content), and contributes to the overall creamy mouthfeel. Do not confuse it with evaporated milk, which is unsweetened and will not yield the same result.
*
Pure Vanilla Extract: A splash of vanilla isn't just for flavor; it enhances and rounds out the sweetness of the other ingredients, adding a warm, comforting note that complements the zesty Nerds.
*
Nerds Candy: The undisputed star! A theater-sized box or a few smaller boxes will do the trick. The beauty of Nerds is their dual texture – a crunchy shell with a chewy center – and their delightful sweet-tart flavor profile. They add a fantastic visual appeal and an exciting textural contrast to the smooth ice cream. Consider using specific flavor combinations like
Strawberry Nerds Ice Cream for an even more focused flavor explosion.
Beyond these essentials, you can get creative with optional additions like a few drops of food coloring to enhance the visual vibrancy, or a pinch of salt to balance the sweetness. The simplicity of these ingredients means you're just moments away from a homemade treat.
Step-by-Step: Crafting Your Easy Nerds Ice Cream Masterpiece
Creating your homemade
nerds ice cream is a straightforward process, ideal for involving children in the kitchen. Follow these simple steps for a truly delightful dessert:
Step 1: Whip the Heavy Cream to Stiff Peaks
* Pour your very cold heavy whipping cream into a large, chilled mixing bowl. Using a stand mixer with a whisk attachment or a handheld electric mixer, beat the cream on medium-high speed.
* Continue beating until the cream forms firm, distinct peaks. When you lift the whisk, the peaks should hold their shape without collapsing. This process typically takes about 3-5 minutes, but keep a close eye on it to avoid over-whipping, which can turn it grainy. The air incorporated here is crucial for the light texture of your no-churn ice cream.
Step 2: Gently Fold in the Sweetened Condensed Milk and Vanilla
* Once your whipped cream is ready, pour the sweetened condensed milk and vanilla extract directly into the bowl.
* Using a large rubber spatula, gently fold the mixture together. The key here is *folding*, not beating. You want to preserve as much of the air in the whipped cream as possible. Continue folding until the condensed milk is fully incorporated and there are no streaks, resulting in a smooth, uniform base.
Step 3: Introduce the Nerds Candy
* Now for the fun part! Open your box of Nerds candy and add them to the ice cream base.
* Using your spatula or a large spoon, gently stir the Nerds into the mixture. Be careful not to over-mix or crush the candies too much, as you want to maintain their distinct crunch and vibrant colors. Stir just enough until they are evenly distributed.
*
Pro Tip for Preventing Sinking: If you want to ensure your Nerds remain evenly suspended throughout the ice cream and don't all sink to the bottom, try this trick: place the plain ice cream mixture (before adding Nerds) into your freezer for about an hour. This will allow it to firm up slightly. Then, remove it, stir in your Nerds, and proceed with freezing.
Step 4: Freeze to Perfection
* Transfer your colorful
nerds ice cream mixture into a freezer-safe container. A loaf pan covered with plastic wrap, a reusable ice cream tub, or an airtight container all work well.
* Cover the container tightly with plastic wrap, pressing it directly onto the surface of the ice cream to help prevent ice crystals from forming. Then, secure the lid if your container has one.
* Place the container in the freezer for a minimum of 10 to 12 hours, or preferably overnight, to allow the ice cream to firm up completely. The longer it freezes, the better the texture will be.
Once fully frozen, scoop out your magnificent creation and enjoy the homemade goodness!
Flavor Adventures Beyond the Original: Customizing Your Nerds Creation
While classic
nerds ice cream is undeniably a hit, the beauty of homemade no-churn lies in its incredible versatility. The basic whipped cream and sweetened condensed milk base is a blank canvas, inviting endless experimentation. Don't be afraid to let your imagination (and your pantry) guide you!
*
Berry Bliss with Strawberry Nerds Ice Cream: One of the most celebrated variations involves fresh fruit. Blending in a cup of pureed fresh strawberries (or raspberries!) before folding in the condensed milk creates a beautifully fruity base that pairs exquisitely with the existing strawberry and grape flavors of many Nerds candies. This combination offers a delightful fresh counterpoint to the candy's sweetness.
*
Citrus Zing: For an extra layer of tang, consider adding a teaspoon of lemon or lime zest, or even a tablespoon of fresh citrus juice, to your base along with the vanilla. This can amplify the tartness of the Nerds, creating an even more refreshing experience.
*
Chocolate Lover's Dream: Swirl in some cocoa powder (sifted to prevent lumps) or melted, cooled chocolate before adding the Nerds for a chocolatey twist. Chocolate chips or chunks can also be added alongside the Nerds for double the texture and flavor.
*
Tropical Escape: A splash of coconut extract and some finely shredded coconut can transport your taste buds to a tropical paradise, especially when combined with vibrant Nerds.
*
Candy Crush Mania: Why stop at just Nerds? Experiment with other favorite candies – gummy bears, sprinkles, mini chocolate candies, or even crushed cookies – for a truly custom creation. Just remember to add these gently to maintain their texture.
*
Saucy Swirls: For a decadent touch, swirl in some fruit sauce, caramel, or hot fudge just before the final freeze. A raspberry coulis or a vibrant mango puree could add an elegant touch.
While this article focuses on the straightforward no-churn method, it's worth noting that other delicious approaches exist for making
nerds ice cream, including rich custard-based recipes that use an ice cream churner. These methods often yield a denser, incredibly smooth ice cream that is equally delightful, offering a different textural experience for those who prefer it. You can explore these diverse techniques and their unique characteristics to find your perfect scoop.
Practical Tips for Homemade Nerds Ice Cream Success
To ensure your homemade
nerds ice cream turns out perfectly every time, keep these practical tips in mind:
*
Keep Everything Cold: For the best whipped cream, ensure your heavy cream, mixing bowl, and beaters are thoroughly chilled. This helps the cream whip up faster and hold its volume better.
*
Don't Over-Whip: While stiff peaks are desired for the cream, be careful not to over-whip it. Over-whipped cream can become grainy and separate. Stop as soon as firm peaks form.
*
Gentle Folding is Key: When combining the whipped cream with the sweetened condensed milk and Nerds, always use a gentle folding motion. This preserves the air in the whipped cream, which is essential for the light, airy texture of no-churn ice cream.
*
Choose the Right Container: Use a shallow, freezer-safe container for freezing. A metal loaf pan or a rectangular plastic container works well. Cover the surface directly with plastic wrap before putting on the lid to prevent ice crystals from forming on top.
*
Patience is a Virtue: Resist the urge to check on your ice cream too early. A full 10-12 hours (or overnight) in the freezer is crucial for it to set properly and develop the right consistency.
*
Soften Before Serving: For the best scoopable texture, let your homemade
nerds ice cream sit out on the counter for 5-10 minutes before serving. This allows it to soften slightly, making it easier to scoop and enhancing its creamy mouthfeel.
*
Storage: Store your ice cream in an airtight container in the freezer for up to 2-3 weeks for optimal freshness. After that, while still safe to eat, the texture may start to degrade.
*
Involve the Kids Safely: Assign age-appropriate tasks. Younger children can help with pouring pre-measured ingredients or gently stirring in the Nerds. Older children can handle the mixer with supervision.
This homemade
nerds ice cream recipe is more than just a dessert; it's an experience waiting to happen. It's about bringing joy to the kitchen, creating memories, and savoring the simple pleasure of a vibrant, sweet-tart treat made with love. So go ahead, gather your ingredients, enlist your little helpers, and get ready to whip up some unforgettable fun!