Unlock the Sweet-Tart Sensation: Crafting Homemade Nerds Ice Cream
Imagine the creamy, cold embrace of homemade ice cream, punctuated by an explosion of tiny, crunchy, sweet, and tart candies. That, my friends, is the irresistible delight of Nerds ice cream! Far from being a mere childhood fantasy, making this vibrant treat at home is not only achievable but also incredibly rewarding. Whether you're a seasoned ice cream enthusiast or a kitchen novice, there's a method for you. We're diving deep into three popular approaches: the ultra-simple no-churn method, the classic churned style, and the rich, velvety custard-based churner method. Get ready to sprinkle some magic into your freezer!
The Undeniable Allure of Nerds Ice Cream
Why has Nerds ice cream captured the hearts (and taste buds) of so many, from nostalgic adults to curious kids? It's the delightful contradiction. Ice cream typically offers a smooth, yielding texture, but Nerds introduce a playful, unexpected crunch that gives way to an immediate burst of intensely fruity, sweet-tart flavor. This textural and flavor contrast is what makes it so utterly compelling. It's not just dessert; it's an experience, a vibrant party in every spoonful. The varying sizes and colors of the candy also add a visually appealing element, making each scoop a miniature masterpiece.
Effortless Indulgence: The No-Churn Nerds Ice Cream Method
For those who dream of homemade ice cream without the need for specialized equipment, the no-churn method is a revelation. It’s so straightforward, even a child can master it, as many home cooks can attest! This technique relies on just two basic ingredients to create a wonderfully creamy base, allowing the vibrant Nerds candy to truly shine.
Ingredients & Equipment for No-Churn Nerds Ice Cream
- 2 cups (or 1 pint) heavy whipping cream, chilled
- 1 can (14 ounces) sweetened condensed milk, chilled
- 1-2 teaspoons pure vanilla extract (optional, but highly recommended)
- 1 (5-ounce, theater-sized) box or equivalent of assorted Nerds candy
- Large mixing bowl
- Electric hand mixer or stand mixer with whisk attachment
- Rubber spatula or spoon
- Freezer-safe container (a loaf pan works perfectly)
Step-by-Step Guide to No-Churn Perfection
- Whip the Cream: In your large mixing bowl, beat the chilled heavy whipping cream on high speed using an electric mixer. Continue beating until the cream forms firm peaks. This means when you lift the whisk, the peaks hold their shape without flopping over. Be careful not to over-beat, or it could turn grainy.
- Fold in Condensed Milk: Gently pour in the chilled sweetened condensed milk and vanilla extract (if using). Using a spatula, carefully fold the condensed milk into the whipped cream until just combined and smooth. Over-mixing here can deflate the airy whipped cream.
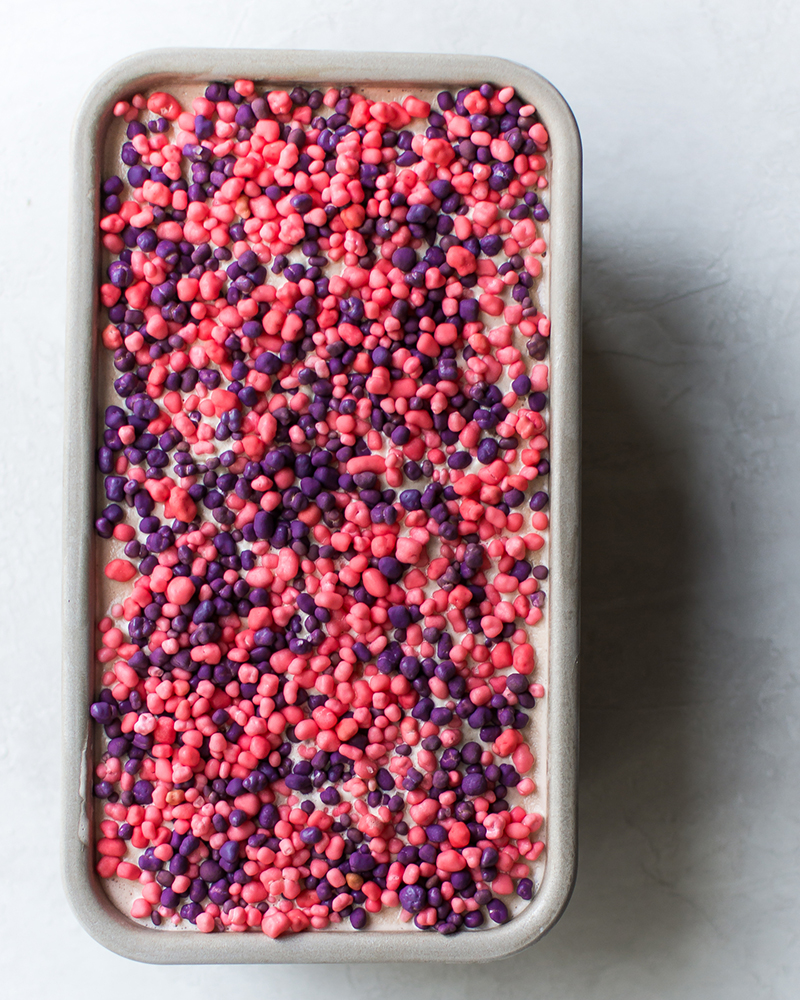
- Add the Nerds: Now for the star of the show! Gently stir in the Nerds candy. To prevent the Nerds from getting too crushed and to ensure they remain evenly distributed rather than sinking to the bottom, use a spoon and mix them in with light, circular motions.
- Pro Tip for Even Distribution: If you're concerned about the Nerds sinking, try this trick: place the plain ice cream mixture (before adding Nerds) into the freezer for about an hour. Once it's slightly firmed up but still soft enough to stir, remove it, gently fold in the Nerds, and then return it to the freezer.
- Freeze to Perfection: Transfer the mixture into your freezer-safe container, smooth the top, and cover tightly (plastic wrap pressed directly onto the surface helps prevent ice crystals). Freeze for a minimum of 10-12 hours, or preferably overnight, until solid.
And that’s it! The next day, you'll be scooping up creamy, crunchy no-churn Nerds ice cream. For more detailed tips and fun variations for this simple method, check out our guide on Easy No-Churn Nerds Ice Cream: Homemade Fun for Kids.
Classic Creaminess: Churned Nerds Ice Cream (Non-Custard)
If you own an ice cream maker, you can easily create a churned version of Nerds ice cream that offers a wonderfully fresh and creamy texture. This method typically uses a simpler base of milk, cream, and sugar, which churns into a lighter, airier consistency than its custard counterpart. The beauty of the churner is its ability to incorporate air while freezing, resulting in a delightfully smooth scoop.
Ingredients & Equipment for Churned Nerds Ice Cream (Non-Custard)
- 1 cup whole milk
- 2 cups heavy cream
- ¾ cup granulated sugar (adjust to taste)
- 1-2 teaspoons pure vanilla extract
- Pinch of salt (enhances flavor)
- 1 (5-ounce) box or equivalent of assorted Nerds candy
- Optional: 1 cup fresh pureed strawberries for a fruity base
- Large mixing bowl
- Whisk
- Ice cream maker (freezer bowl type needs pre-freezing for 24 hours)
- Freezer-safe container
Step-by-Step Churning for Sweet-Tart Bliss
- Prepare the Base: In a large bowl, whisk together the milk, heavy cream, sugar, vanilla extract, and pinch of salt until the sugar is completely dissolved. If you're making a strawberry version, blend fresh strawberries until smooth and incorporate them into this mixture.
- Chill Thoroughly: Cover the mixture and refrigerate it for at least 2 hours, or preferably overnight. A well-chilled base is crucial for achieving the best texture in your ice cream maker.
- Churn the Mixture: Pour the chilled mixture into your ice cream maker's freezer bowl and churn according to the manufacturer's instructions. This usually takes between 15-30 minutes, until the ice cream reaches a soft-serve consistency.
- Add the Nerds: This is a critical step! When the ice cream has *almost* finished churning and is nearly at its desired consistency, add the Nerds candy directly into the churning mixture. Let it churn for just the last 1-2 minutes to incorporate them without over-crushing. This ensures a delightful crunch in every bite.
- Harden (Ripen) in Freezer: Transfer the soft Nerds ice cream to a freezer-safe container. Press plastic wrap directly onto the surface and cover with a lid. Freeze for an additional 2-4 hours to allow it to firm up to a scoopable consistency.
Flavor Focus: The Strawberry Sensation
While a classic vanilla base with Nerds is undeniably delicious, many enthusiasts rave about a strawberry base. The bright, fresh tang of strawberry ice cream, especially when paired with strawberry-flavored Nerds, creates an irresistible harmony. The natural acidity of the strawberries perfectly complements the candy's tartness, elevating the entire experience. For a deep dive into this particular flavor combination, explore our article on Strawberry Nerds Ice Cream: The Irresistible Sweet-Tart Treat.
Elevating Your Scoop: The Custard Base Churner Method
For those who appreciate the ultimate in rich, dense, and incredibly smooth ice cream, a custard base is the way to go. This method involves cooking egg yolks to create a classic French-style créme anglaise, which results in an unparalleled creamy texture and often less ice crystal formation. It requires a bit more care, but the payoff is a truly gourmet Nerds ice cream experience.
Ingredients & Equipment for Custard Nerds Ice Cream
- 1 ½ cups heavy cream
- 1 ½ cups whole milk
- 2 teaspoons vanilla extract (or seeds from 1 vanilla bean)
- 6 large egg yolks
- ¾ cup granulated sugar
- 1 ½ cups assorted Nerds candy
- Small saucepan
- Large mixing bowl
- Whisk
- Fine-mesh sieve
- Ice cream maker (freezer bowl pre-frozen for 24 hours)
- Freezer-safe container
Crafting the Velvety Custard Base
- Heat the Dairy: In a small saucepan, combine the heavy cream, whole milk, and vanilla extract (or vanilla bean seeds). Heat on medium-low for about 10-15 minutes, stirring occasionally. Do not allow it to boil; you're just looking for it to be hot and steamy.
- Prepare the Yolks: While the dairy heats, combine the egg yolks and sugar in a large mixing bowl. Whisk vigorously until the mixture is pale yellow and slightly thickened. This process is called "ribboning" when it falls in a ribbon from the whisk.
- Temper the Yolks: This is the most crucial step. Slowly and gradually ladle about ¼ cup of the warm dairy mixture into the egg yolk mixture while continuously whisking the yolks. This process, called tempering, slowly brings the egg yolks up to temperature without scrambling them. Continue adding warm liquid, about ¼ cup at a time, whisking constantly, until about half of the warm liquid has been incorporated into the yolks.
- Combine and Cook: Pour the tempered egg yolk mixture back into the saucepan with the remaining warm dairy. Return to medium-low heat and cook, stirring constantly with a spatula or wooden spoon, until the mixture thickens enough to coat the back of a spoon (reaching about 175-180°F or 80-82°C). Do not boil!
- Strain and Chill: Immediately remove the custard from the heat and pour it through a fine-mesh sieve into a clean bowl. This catches any bits of cooked egg or vanilla bean. Cover the surface directly with plastic wrap to prevent a skin from forming and refrigerate for at least 4-6 hours, or ideally overnight, until thoroughly chilled.
Churning and Finishing Touches
- Churn the Custard: Pour the well-chilled custard base into your ice cream maker and churn according to the manufacturer's directions, usually 20-30 minutes, until it reaches a soft-serve consistency.
- Fold in Nerds: In the last 1-2 minutes of churning, add the Nerds candy to the ice cream maker. This ensures they are incorporated without being overly crushed.
- Harden (Ripen): Transfer the soft Nerds ice cream to a freezer-safe container, press plastic wrap directly onto the surface, and cover with a lid. Freeze for an additional 4-6 hours for a firm, scoopable texture.
Unleash Your Inner Ice Cream Alchemist: Customizing Your Nerds Treat
The beauty of homemade ice cream lies in its versatility. Once you've mastered the basic methods, don't be afraid to experiment and personalize your Nerds ice cream!
- Flavor Combinations: While vanilla and strawberry are classics, consider other bases like lemon, lime, or even a subtle blue raspberry to match the Nerds' spectrum of flavors. A hint of food coloring can also boost the visual appeal.
- Layered Fun: Instead of mixing all the Nerds in, try layering them. Pour half the ice cream mixture into your container, sprinkle a layer of Nerds, then add the remaining ice cream and another generous sprinkle on top before freezing.
- Additional Mix-ins: For an extra layer of texture and flavor, consider adding other small candies, sprinkles, or even white chocolate chips alongside your Nerds. Just remember the goal is delightful contrast, not overwhelming sweetness.
- Serving Suggestions: Scoop your homemade Nerds ice cream into waffle cones, serve it à la mode with a brownie, or blend it into a milkshake for an extra-thick, crunchy treat. A final sprinkle of Nerds just before serving adds a wonderful visual and textural flourish.
Conclusion
From the lightning-fast no-churn method to the rich, traditional custard, creating your own Nerds ice cream at home is an adventure in flavor and texture. It’s a project that promises fun for the whole family and a treat that delights with every sweet, tart, and crunchy bite. So gather your ingredients, choose your method, and prepare to embark on a delicious journey. The only limit is your imagination!
